Let's Get Technical, Technical
Posted January 12, 2017 by Natalie
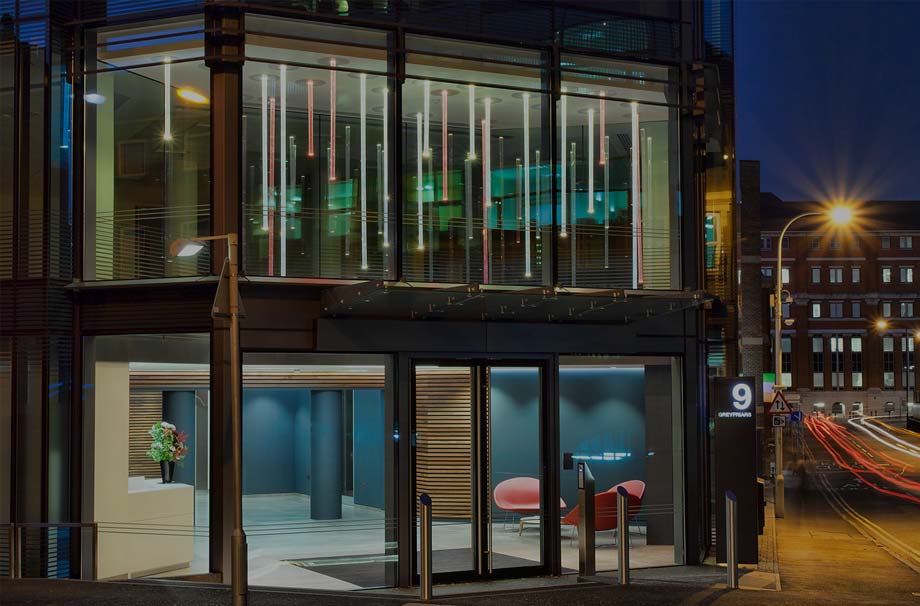
If you’re looking at those impressive tubes of light up there in the window thinking “I wonder how they did that” then this blog post’s for you. It’s also for you if you just really really like technical diagrams. Ok, let’s set the scene: working in partnership with the architects at Barton Willmore for client Mackay Securities plc, we were tasked with creating a highly energy efficient lighting design for an £800m HQ office redevelopment. As well as making it incredibly sustainable, the client wanted to give the building a new lease of life and a more modern appearance.
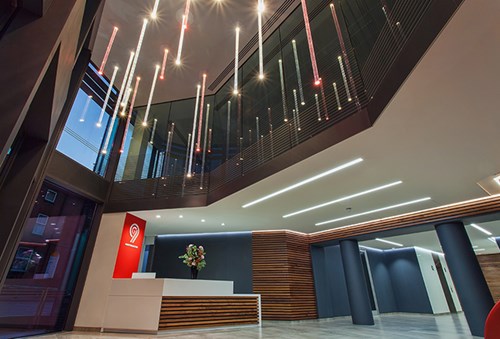
The double height space atrium in the reception area.
The use of sleek linear LEDs went a long way towards meeting these requirements but, if you’re going to boast a double height space atrium in your reception area, you’re going to want to complement it with a striking contemporary installation piece. To echo the clean lines of the building façade we designed a bespoke feature chandelier which was constructed from individual, vertically hung acrylic rods – lit from above by a recessed LED light source. To coordinate with the striking office colour palette a red filter was added to a select few of the chandelier cluster, creating even more interest. The glass of the interior and exterior of the building was also employed for maximum impact. Pop quiz – can you tell exactly how many tubes there are by looking at the image below? Don’t feel bad, neither can we.

The bespoke chandelier, seen from below.
However, it wasn’t all plain sailing. Installation requirements, aesthetic considerations and a Health and Safety-shaped challenge all meant that the chandelier design required several amendments before the final product could be arrived at. Earlier, if you remember, we threatened you with technical diagrams. Now, we’re about to make good on that threat.
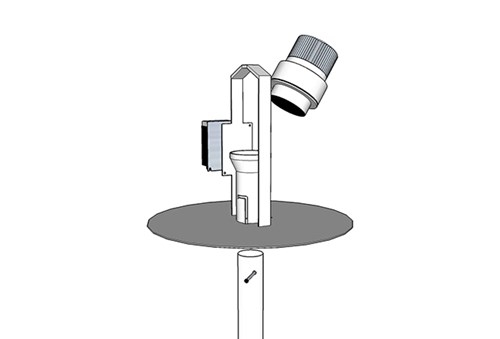
In our initial concept, the luminaire was originally composed of a simple housing fixed to the ceiling using large ‘L’ clamps (see drawing 1). After having a sample built, the contractors asked if we could create a fixing mechanism that was closer to that of a standard downlighter. We put our thinking caps on. Took them off for some light head scratching. And then put them back on again. The result of these efforts can be seen below in drawing 2.
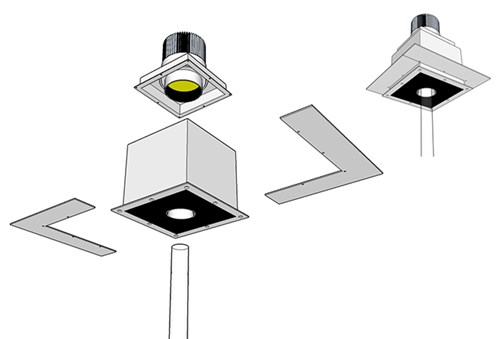
Drawing 1 – Initial Design: Simple recessed body. ‘L’ clamps designed to be lifted up through ceiling cut-out and screwed to bezel beneath plasterboard. Acrylic rod held in place by male-female bolt within shadow gap of body, designed to allow enough room for hands and tools. Luminaire bolted to top of bespoke body.
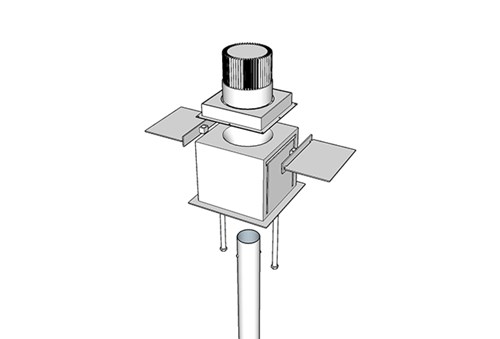
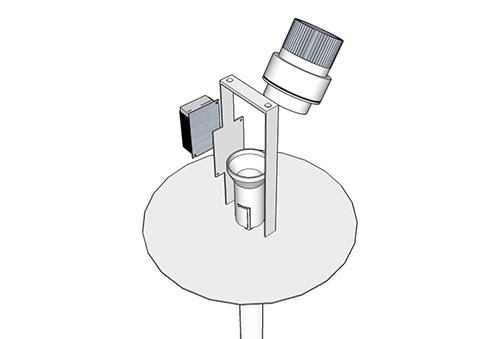
Drawing 2 – Post Sample Amendment: ‘L’ clamps replaced by paddle clamps. To install, the whole body is now to be lifted into the ceiling cut-out. The paddles are then lifted up through the shadow gap and slid through the exaggerated slots at the top of the body. They are then dropped down the sides of the body and bolted in place. This approach gave the added advantage of a clean bezel with no holes or visible fixings.
The next amendment came as a result of the client’s request for a cleaner design, one that would integrate as seamlessly as possible with the ceiling, so that the lit rods were the only visible feature of the lighting installation. This meant an entirely different approach to fixing the luminaires was required. In addition, we received a recommendation from the client’s HSE consultant that it would be advisable for the chandelier to be able to be maintained from ground level. Slipping back into our thinking caps, we set about creating a solution whereby the luminaires were fixed to the slab, not the ceiling, and we integrated a motorised hoist which allowed the luminaire to be lowered for maintenance by remote control (see drawing 3). As a result of this new design, the hoist could be attached directly to the luminaire to reduce the required void depth (see drawing 4).
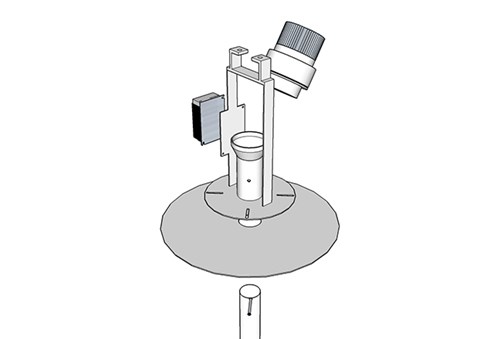
Drawing 3 – First Major Revision: No shadow gap, cover plate completely flat and as flush as possible to visually integrate with ceiling. Tool-free removal and fitting of bespoke LED light engine designed to seat into the luminaire body and be held by gravity. Tool-free fitting and removal of acrylic rod by way of bayonet style J slot fixing. Driver integrated into luminaire body for ease of access.
Drawing 4 – Fixing holes modified to allow rise and fall hoist to be bolted directly to luminaire body.
We were now feeling very pleased with ourselves but, before our heads could be left fully unadorned, some more pontificating was required: the space below the bolt holes needed to be increased to allow for tool access; furthermore, the cover plate needed separating from the body of the luminaire and spring loading to allow the hoist to raise the luminaire without damaging the ceiling (see drawing 5). After incorporating these amendments, the product design was finalised and can be seen in drawing 6.
Drawing 5 – Fixing holes again modified, raised above luminaire body. Cover plate separated from body to allow it to float and give a little as the hoist raises luminaire into place.
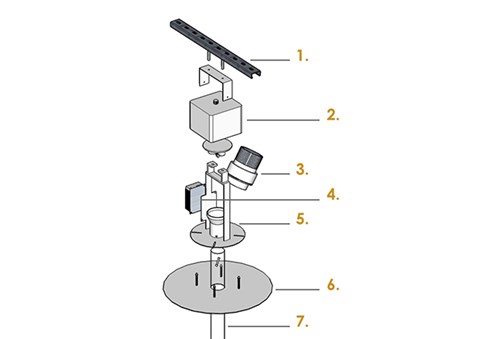
Drawing 6 – Final Design: Fully worked up version showing all components, including contractor supplied unistrut to fix to the slab: 1. Unistrut fixed to slab; 2. High quality rise and fall hoist; 3. Custom LED light engine; 4. Electronic driver; 5. Luminaire body; 6. Spring loaded decorative cover plate; 7. 1m-3m clear acrylic rod.
At last, our design looked the part and met the client’s requirements as well as the strict H&S regulations. Also, the energy efficiency of our design contributed towards 9 Greyfriars exceeding its BREEAM target of ‘Excellent’ and, instead, achieving an outstanding rating of… ‘Outstanding’. Challenge? What challenge? Said we, laughing heartily as our long hair blew freely in the breeze. Have you had enough geek yet? Or would you like a little more? A little more it is, then. Okay – we’ll finish by confiding in you that we named the final product. That’s right. And the name that we chose was Kageyoshi, taken from the cult Japanese Manga/Anime, Bleach. Its literal translation means ‘vibrant display’ and it’s inspired by the visual appearance of character Byakuya Kuchiki’s sword technique, where a procession of glowing swords rise from the ground. If you’re still awake, you can witness this luminous spectacle in the image below.
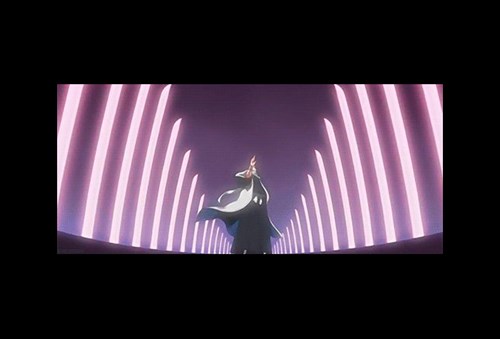
Our inspiration for the Kageyoshi chandelier.
We’ll get our coats.
Thank you so much for reading about our latest project. If you’d like to check out all the photos and learn a little more about the rest of the project, you can visit our case study here. We’ll be in touch soon with more updates from the Darklight side.
The DD team.